Budget for luxury vinyl plank flooring

How to Budget for New Luxury Vinyl Plank Flooring

When planning to install vinyl flooring in your home, luxury vinyl plank flooring is an excellent choice. It offers the perfect combination of durability, style, and affordability. However, like any home improvement project, proper budgeting is key to ensuring the process goes smoothly. In this guide, we’ll walk you through what to consider when budgeting for new luxury vinyl plank flooring, from material selection to installation costs.

Understanding the Cost of Luxury Vinyl Flooring

The price of luxury vinyl flooring can vary greatly depending on several factors. Some of the biggest cost contributors include the quality of the vinyl plank flooring, the type of vinyl you choose, and whether you’re replacing existing vinyl flooring. On average, you can expect to pay between $2 to $7 per square foot for luxury vinyl planks.

Luxury vinyl flooring comes in various designs and styles, mimicking everything from natural hardwood to stone, and the pricing reflects these variations. Higher-end flooring planks with more intricate patterns or textures will likely cost more than simpler, standard options. It’s essential to visit a luxury vinyl flooring store in Plano, TX, to explore your options and find something that suits both your style and budget.

Calculating How Much Flooring You’ll Need

Once you’ve chosen your preferred type of vinyl plank flooring, the next step is calculating how much you’ll need. Measure the total square footage of the area where the new flooring will be installed. Don’t forget to add around 10% more to account for mistakes or cuts during installation. This buffer ensures that you’re covered for any unexpected surprises that arise when fitting the flooring planks.

Additional Material Costs Beyond Vinyl Planks

While the luxury vinyl itself forms the bulk of the cost, there are additional materials required to install vinyl flooring in your home. These may include:

  1. Underlayment: Depending on the existing subfloor, you might need to invest in underlayment to provide a smooth surface for the new luxury vinyl installation. This can range from $0.30 to $0.50 per square foot.
  2. Transition Strips: If you’re connecting your new vinyl plank flooring to other types of flooring in the home, transition strips are required to create a seamless look. These typically cost around $10 to $20 each.
  3. Adhesive or Double-Sided Tape: Some types of vinyl planks require adhesive to stay in place, while others are designed to float above the subfloor. Make sure to account for these extra costs when calculating your overall budget.

Professional Installation vs. DIY: Which Is Right for You?

One of the most significant factors to consider in your budget is whether to hire professionals or tackle the vinyl plank installation yourself. Both approaches have their pros and cons.

DIY Installation:
Many homeowners choose to install vinyl flooring themselves, as it is relatively easy compared to other flooring options. With the right tools—like a utility knife, measuring tape, and spacers—it’s possible to achieve a professional-looking finish. Luxury vinyl plank flooring often uses a click-and-lock system, allowing the flooring planks to easily snap together without the need for glue or nails. However, if you’re not confident in your DIY skills, attempting it yourself could lead to mistakes that might affect the longevity and performance of the floor.

Professional Installation:
While DIY is an option, professional luxury vinyl installation is worth considering for a flawless finish. A trained installer will ensure the vinyl planks are properly aligned, cut to fit your space, and seamlessly connected to other flooring types. On average, professional installation costs between $1.50 and $3 per square foot. Hiring experts from a flooring installation company ensures the job gets done quickly, and you avoid the potential headaches of handling the project alone.

At Nationwide Floor & Window Coverings in Plano, TX, we offer professional installation services to help homeowners achieve their desired look with minimal stress. Our installers have years of experience with luxury vinyl flooring, ensuring every detail is handled with precision.

Hidden Costs to Consider

When budgeting for your new luxury vinyl flooring, it’s crucial to think beyond just the flooring planks and installation. There are some hidden costs that could arise, such as:

  • Old Flooring Removal: If you’re replacing existing vinyl flooring or another type of flooring, removal can add to the overall cost. Professionals usually charge between $1 and $3 per square foot to remove old flooring, depending on the complexity.
  • Subfloor Preparation: Uneven subfloors can cause issues during installation. Your contractor may need to level the subfloor before laying the vinyl planks, which can cost extra.
  • Moving Furniture: While some flooring installation companies offer furniture moving as part of their service, others may charge an additional fee. Always confirm this beforehand to avoid unexpected expenses.

Saving Money on Your Luxury Vinyl Plank Flooring Project

Everyone loves a good deal, especially when it comes to home improvement. Here are a few tips to help you save money on your luxury vinyl plank flooring without compromising on quality:

  • Shop Sales and Discounts: Visit your local luxury vinyl flooring store and ask about any ongoing promotions or discounted flooring options. Stores often have clearance sections for discontinued or overstocked items, allowing you to get premium flooring at a lower price.
  • Plan During the Off-Season: Flooring companies may offer lower installation rates during slower seasons. Planning your project during a quieter time could help you snag a better deal on professional installation.
  • Consider Lower Price Ranges: There are various price ranges for vinyl flooring, with many budget-friendly options that still provide a high-end look. You don’t need to purchase the most expensive flooring to achieve great results.

Installation Tools and Miscellaneous Expenses

If you decide to go the DIY route, factor in the cost of tools you may need to purchase, such as a utility knife, spacers, and a tapping block for a successful vinyl plank installation. Though the tools are relatively inexpensive, they still add to the overall project cost.

You’ll also need safety gear like gloves and knee pads, as installing vinyl flooring can be a physically demanding process, especially when cutting and trimming the flooring planks to fit your space.


Planning your budget for luxury vinyl flooring is an essential step in achieving a successful flooring project. From the cost of materials and tools to professional installation services, it’s important to consider all aspects to ensure you’re not caught off guard by hidden expenses. Whether you’re looking for affordable vinyl options or high-end designs, Nationwide Floor & Window Coverings in Plano, TX, is here to help you every step of the way.

Kitchen Backsplash

How Do I Choose a Backsplash Color for My Kitchen?

When it comes to selecting the perfect kitchen backsplash, one of the most important considerations is color. Whether you’re renovating your entire kitchen or just looking to freshen up its look, choosing the right backsplash color can dramatically transform the space. Your backsplash is not just a functional element but also a focal point that can tie together your kitchen design.

Start with Your Color Scheme

The first step to choosing a kitchen backsplash is to evaluate your existing color scheme. Look at your countertops, cabinets, and overall kitchen design. These elements serve as your foundation. Are your countertops bold or neutral? Are your cabinets stained wood, painted white, or a custom hue? By analyzing these elements, you’ll be better prepared to match colors or create a complementary contrast with your backsplash.

If your kitchen design leans toward a neutral palette with white or gray cabinets and countertops, you can add a pop of color with a vibrant kitchen backsplash tile. On the other hand, if your countertops and cabinets are bold, a neutral or subtle backsplash can balance the space.

Popular Backsplash Colors and Patterns

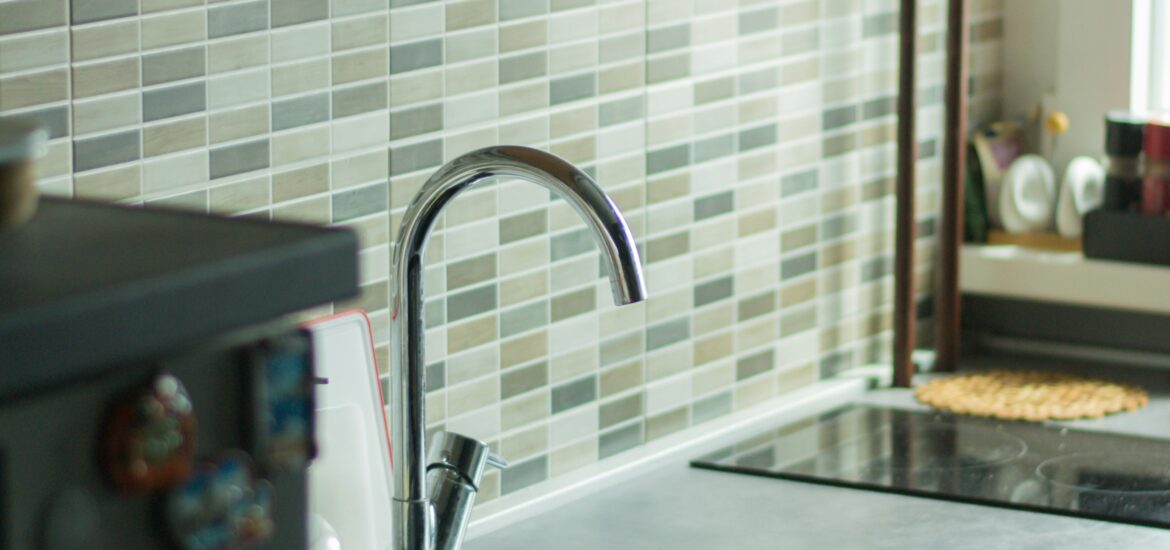
Once you’ve established your kitchen’s overall color scheme, it’s time to explore backsplash colors and patterns that match your style. You might choose a backsplash tile in a solid color to blend with your kitchen’s tones, or you could opt for mosaic tiles that create a more complex visual effect. Mosaic tiles, especially those that combine different shades, are ideal if you want a more dynamic and textured appearance.

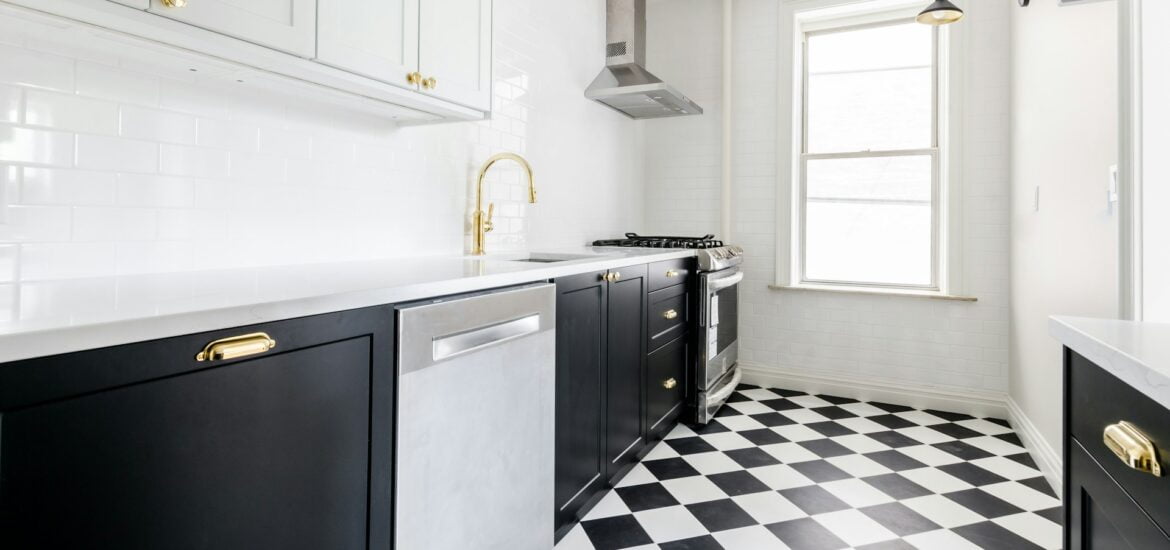
If you’re looking for timeless options, subway tiles remain a popular choice. Their clean lines and simple style work well in a variety of kitchen designs, whether modern, traditional, or farmhouse. Subway tiles come in a range of colors, including classic white, gray, and even vibrant hues. Choosing a bright or bold color for your subway tile can make the backsplash stand out without overwhelming the space.

For those who prefer an industrial look, stainless steel backsplash tiles can offer a sleek, modern finish. Stainless steel is not only durable and stain resistant, but it also pairs well with many appliances and kitchen fixtures, providing a cohesive, polished look.

Coordinating Your Backsplash with Countertops and Cabinets

When you choose a backsplash, it’s crucial to ensure it complements your countertop and cabinets. If your countertops are made of granite or quartz with intricate patterns, a more straightforward backsplash, like white or neutral subway tiles, may work best. The simplicity of the backsplash allows the beauty of your countertops to shine without competing for attention.

On the other hand, if your countertops and cabinets are more understated, you have more freedom to experiment with colors and patterns for the kitchen backsplash. Consider mosaic tiles or intricate tile patterns to add visual interest. The key is to create balance—if one element is bold, keep the others more subdued to avoid an overly busy look.

Tile Patterns for a Unique Look

Aside from color, the pattern of your kitchen backsplash can greatly influence the overall feel of the space. Classic subway tiles can be installed in a traditional horizontal pattern, but you can also experiment with more unique arrangements, such as herringbone or vertical stacking. Tile patterns are an excellent way to add flair and personality without overwhelming your kitchen design.

Mosaic tiles, known for their intricate designs and variety of materials, are another popular option. Whether made of glass, stone, or ceramic, mosaic tiles create a textured look that can either complement or contrast your countertop and cabinets. These types of backsplash tiles are available in a wide array of colors and patterns, making it easy to find a design that fits your kitchen’s aesthetic.

Matching Backsplash Colors with Your Appliances

Another factor to consider when you choose a backsplash is your kitchen appliances. Stainless steel appliances are standard in modern kitchens, so it’s important to think about how your backsplash will look next to them. Stainless steel tiles or accents can tie everything together, but if you want more warmth, neutral-colored tiles like beige, cream, or warm grays can soften the sleek look of the appliances.

For those who want to add a bit of contrast, a darker backsplash can create a striking effect against stainless steel appliances. Just make sure that the colors you select harmonize with your overall kitchen design rather than clashing.

Consider the Lighting in Your Kitchen

When selecting backsplash colors, don’t forget about your kitchen lighting. Natural light can make bright tiles appear even more vibrant, while artificial lighting can enhance the warmth or coolness of your backsplash colors. For darker kitchens with limited natural light, choosing a lighter backsplash color, like white or cream, can help brighten the room. In contrast, a kitchen with plenty of sunlight can handle darker or bolder colors without feeling closed in.

Glossy tiles reflect light, making your kitchen feel larger and more open. Matte finishes, on the other hand, can create a more understated look, which is ideal if you want to draw attention to other kitchen elements like your countertop or cabinets.

Working with an Interior Designer

If you’re unsure which backsplash colors or tile patterns will work best in your kitchen, consider consulting an interior designer. Many kitchen backsplash stores, including ours here at Nationwide Floor & Window Coverings near Plano, TX, offer in-store consultations with design experts who can help guide your decision.

Interior designers are skilled at blending different elements of your kitchen, from countertops to cabinets, ensuring your backsplash complements the space perfectly. They can also help you explore creative ideas you might not have considered, like combining different tile patterns or incorporating unique materials like glass or stainless steel.

Practical Considerations

While the aesthetic appeal of your kitchen backsplash is essential, it’s also important to consider practicality. Kitchens are high-traffic areas prone to spills and splashes, so it’s crucial to choose a backsplash that’s stain resistant and easy to clean. Materials like ceramic and porcelain tiles are not only durable but also offer a wide range of colors and patterns to suit your kitchen design.

Stainless steel tiles are another practical option, particularly for homeowners who want a modern, industrial look. These tiles are incredibly durable and stain resistant, making them ideal for busy kitchens. Additionally, stainless steel tiles are easy to wipe down, ensuring your backsplash stays spotless for years to come.

We’ll Bring the Tile to YOU!

At Nationwide Floor & Window Coverings near Plano, TX, we specialize in helping you choose the perfect kitchen backsplash. Our selection includes an array of colors and patterns, including mosaic tiles, subway tiles, and stainless steel options. Whether you’re looking to match colors with your countertop and cabinets or want to explore unique tile patterns, our knowledgeable team is here to help. We are a mobile showroom and will bring the tile to you! You’ll love comparing samples right there in your home.

Why We Love COREtec

Why We Love COREtec Flooring for Your Home

When it comes to choosing the right flooring for your home, it’s easy to be overwhelmed by the many options available. Hardwood floors have their timeless appeal, and tile offers durability, but there’s a new player in the game that’s quickly become a favorite among homeowners—COREtec. At our COREtec flooring store in Plano, TX, we’ve seen firsthand why this luxury vinyl floor has won over so many. Here’s why we love COREtec, and why it might be the perfect fit for your home.

The Beauty of COREtec

One of the first things you’ll notice about COREtec is its stunning appearance. Designed to mimic the natural beauty of hardwood floors, COREtec vinyl plank flooring offers a wide variety of styles, colors, and textures. Whether you prefer the classic look of oak or the rich tones of walnut, there’s a COREtec floor that will perfectly complement your home’s decor.

But COREtec doesn’t just look like wood—it feels like it too. The embossed surface gives the planks a realistic texture that closely resembles real hardwood. This attention to detail is one of the reasons why COREtec has become such a popular choice for those who want the elegance of hardwood without the maintenance and cost associated with it.

Durability That Stands the Test of Time

COREtec floors are not just about good looks; they’re built to last. What sets COREtec apart from other luxury vinyl flooring is its unique multi-layer construction. Each plank is made up of several layers, including a resilient wear layer that protects against scratches, dents, and stains. This wear layer is essential for maintaining the floor’s appearance, especially in high-traffic areas like hallways and living rooms.

Underneath the wear layer, COREtec features a solid core structure that gives the planks their stability and strength. This core is made from a special composite material that makes the floor 100% waterproof. Whether you’re dealing with spills in the kitchen or moisture in the bathroom, you can trust that your COREtec floor will withstand it all.

Easy Maintenance for Busy Lifestyles

One of the biggest advantages of COREtec flooring is how easy it is to maintain. Unlike hardwood floors, which require regular sanding and refinishing, COREtec floors can be kept looking like new with just a simple cleaning routine. A quick sweep or vacuum will take care of everyday dust and debris, while a damp mop with a gentle cleaner will remove any spills or stains.

Because COREtec is a waterproof luxury vinyl floor, you don’t have to worry about water damage or warping, even in areas like basements or laundry rooms. This makes it an ideal choice for families with kids and pets, where accidents are bound to happen. The durability and low-maintenance nature of COREtec make it a smart investment for any home.

The Versatility of COREtec

Another reason we love COREtec is its versatility. Whether you’re renovating a single room or redoing your entire home, COREtec flooring offers solutions for every space. The vinyl plank design allows for easy installation in rooms of all shapes and sizes, and the variety of styles ensures that there’s a perfect match for every aesthetic.

COREtec floors can also be installed over most existing floors, which makes the renovation process quicker and more cost-effective. This is especially beneficial for those looking to update their home without the hassle of tearing out old flooring. Plus, COREtec’s stable construction means that it can be installed in areas where traditional hardwood floors might not be suitable, such as basements or bathrooms.

A Healthier Home Environment

Indoor air quality is a concern for many homeowners, especially those with allergies or respiratory issues. Fortunately, COREtec flooring contributes to a healthier home environment. COREtec floors are GreenGuard Gold Certified, meaning they have low chemical emissions and contribute to better indoor air quality.

The flooring’s resistance to mold and mildew also helps maintain a clean and healthy living space. This is particularly important in areas prone to moisture, like bathrooms or basements. With COREtec, you can enjoy beautiful flooring without worrying about potential health risks.

The Environmental Benefits of COREtec

In addition to its health benefits, COREtec is also an environmentally friendly choice. The core structure of COREtec floors is made from recycled wood and bamboo dust, limestone, and virgin PVC. This eco-friendly composition not only reduces waste but also results in a more sustainable product.

For homeowners who are environmentally conscious, choosing COREtec means investing in flooring that is both beautiful and better for the planet. The durability of COREtec also means that you won’t need to replace your floors as frequently, reducing the overall environmental impact.

The Comfort of COREtec

While durability and appearance are crucial, comfort is another key factor that sets COREtec apart. The multi-layer construction of COREtec floors provides a softer feel underfoot compared to traditional hardwood or tile. This makes it a more comfortable option for rooms where you spend a lot of time standing, like the kitchen.

Additionally, COREtec floors are naturally warmer than tile, making them a great choice for colder climates or rooms like basements that tend to be chilly. The comfort layer in COREtec’s construction also helps to reduce noise, making it a quieter option for upstairs rooms or multi-story homes.

Installation Made Easy

Installing new flooring can be a daunting task, but COREtec makes the process as smooth as possible. COREtec floors feature a click-lock installation system that allows the planks to easily snap together, eliminating the need for nails or glue. This makes it possible for even DIY enthusiasts to achieve professional-looking results.

For those who prefer to leave installation to the experts, our COREtec flooring store in Plano, TX offers professional installation services to ensure your new floors are laid perfectly. With COREtec, you can enjoy a hassle-free installation process and start enjoying your new floors sooner.

The Value of COREtec

When it comes to home renovations, value is always a top consideration. COREtec offers an exceptional balance of affordability, quality, and style. While it may not be as inexpensive as some other vinyl options, the long-term benefits of COREtec, including its durability, low maintenance, and timeless appeal, make it a wise investment.

Moreover, because COREtec mimics the look of hardwood floors at a fraction of the cost, you can achieve the high-end appearance you desire without breaking the bank. This combination of luxury and practicality is why COREtec continues to be a top choice among homeowners.


COREtec flooring has quickly become one of the most popular choices for homeowners seeking a durable, stylish, and low-maintenance flooring solution. Its combination of beauty, durability, and versatility makes it an ideal option for any room in your home. Whether you’re drawn to its realistic wood-like appearance, its waterproof properties, or its easy installation, COREtec offers something for everyone. At our COREtec flooring store in Plano, TX, we’re proud to offer a wide selection of these exceptional floors, helping you find the perfect match for your home.

Tile Floor Maintenance Tips

Tile Floor Maintenance Tips for a Lasting Shine

Tile flooring is a popular choice for homeowners due to its durability, versatility, and aesthetic appeal. Whether you’ve chosen ceramic or porcelain tiles for your home, maintaining that fresh, just-installed look requires regular upkeep. At our tile flooring store in Plano, TX, we often emphasize that proper maintenance not only keeps your floors looking pristine but also extends their lifespan. Here are some expert tips on how to care for your tile floors.

Daily and Weekly Tile Floor Care

The foundation of maintaining your tile flooring lies in daily and weekly cleaning routines. Regular sweeping or vacuuming is essential to prevent dirt and debris from scratching the surface of your tiles. Use a soft-bristle broom or a vacuum with a hard floor setting to avoid any potential damage.

Tip: Always ensure that your vacuum cleaner’s wheels are clean and free of debris to prevent scratching your tile floor.

How to Clean Tile Floors

Cleaning your tile floors effectively requires the right tools and methods. Here’s a simple, yet effective process to follow:

  1. Prepare Your Cleaning Solution: Mix a few drops of dish soap with warm water. This gentle solution is safe for all types of flooring, including ceramic and porcelain tile floors. Avoid using harsh chemicals that can damage your tiles and grout lines.
  2. Mop the Floor: Use a sponge mop to clean the tile surface. The sponge mop is ideal as it effectively picks up dirt without pushing dirty water into the grout lines. Dip the mop into the cleaning solution, wring it out thoroughly, and then clean a small section of the floor at a time.
  3. Rinse with Hot Water: After cleaning, it’s crucial to rinse the floor to remove any soap residue. Fill your bucket with hot water, and mop the floor again. This step ensures that no residue is left behind, which could make your tiles look dull over time.
  4. Air Dry: Allow your tile floors to air dry. If you’re in a hurry, you can speed up the process by using a clean, dry microfiber cloth to wipe the surface. This method is especially effective for larger areas like kitchens or living rooms.

Scrub the Grout

Grout lines are often the first areas to show signs of wear and dirt accumulation. To keep them looking fresh, you’ll need to scrub the grout periodically. Here’s how:

  1. Create a Grout Cleaner: Mix baking soda and water to form a thick paste. Baking soda is a natural abrasive that effectively removes grime without damaging your tiles.
  2. Apply the Paste: Use an old toothbrush or a grout brush to apply the paste directly to the grout lines. Scrub gently but firmly to lift stains and dirt.
  3. Rinse the Grout: After scrubbing, rinse the grout lines with warm water and wipe away any residue with a clean cloth.
  4. Deep Clean: For stubborn stains, you might need to deep clean the grout using a specialized grout cleaner. Be sure to follow the manufacturer’s instructions to avoid damaging the tiles and grout.

Dealing with Different Types of Tile Flooring

Different types of flooring require slightly different maintenance techniques. Here’s a quick guide:

  • Ceramic Tile Floors: Ceramic tiles are known for their durability and water resistance, making them easy to maintain. Regular cleaning with dish soap and warm water is usually sufficient. For a deeper clean, use a cleaning solution specifically designed for ceramic tiles.
  • Porcelain Tile Floors: Porcelain tiles are denser and more resistant to stains than ceramic tiles. However, they can still benefit from regular cleaning and grout care. Use a pH-neutral cleaning solution to avoid damaging the tiles.

Preventative Maintenance for Tile Floors

Preventative care is key to maintaining the beauty and functionality of your tile flooring. Here are some tips to keep in mind:

  • Sweep or Vacuum Regularly: As mentioned earlier, sweeping or vacuuming regularly prevents dirt and debris from scratching the tile surface. This is particularly important in high-traffic areas.
  • Use Mats and Rugs: Place mats at entryways to reduce the amount of dirt and moisture that gets tracked onto your tile floors. Area rugs can also help protect high-traffic zones.
  • Avoid Excessive Water: While tile floors are water-resistant, excessive water can weaken the grout over time. When mopping, avoid soaking the floor, and always use a damp, not wet, mop.
  • Seal Your Grout: Sealing your grout lines every few years can protect them from stains and moisture. This simple step can significantly extend the life of your grout.

How to Handle Stubborn Stains

Occasionally, you might encounter stubborn stains that require more than just regular cleaning. Here’s how to tackle them:

  1. Identify the Stain: The type of stain will determine the best cleaning approach. For example, grease stains can be lifted with a mixture of baking soda and water, while rust stains may require a commercial cleaner designed for tile floors.
  2. Spot Clean: Always start by spot cleaning the affected area. Apply your cleaning solution directly to the stain and let it sit for a few minutes. Then, scrub gently with a soft cloth or brush.
  3. Rinse Thoroughly: After removing the stain, rinse the area with hot water to remove any residue. This step is crucial to prevent any cleaning solution from leaving a film on your tiles.

Special Considerations for Different Rooms

Different rooms in your home may have unique requirements when it comes to tile floor maintenance:

  • Kitchen Floors: Kitchens are prone to spills and splatters, so it’s important to clean up messes immediately to prevent staining. Regularly mop the floor with dish soap and warm water to keep it looking its best.
  • Bathroom Floors: In bathrooms, moisture can lead to mold and mildew in the grout lines. Scrub the grout regularly and ensure the room is well-ventilated to prevent these issues.
  • Living Areas: For tile floors in living rooms or hallways, sweeping or vacuuming is essential to prevent scratches. Use area rugs to protect the tiles in high-traffic areas.

Maintaining your tile flooring doesn’t have to be a daunting task. With regular care and the right cleaning techniques, you can keep your tiles looking new for years to come. Whether you’re dealing with ceramic tile floors, porcelain tile floors, or any other type of tile floor, these tips will help you achieve a spotless and well-maintained surface. And if you ever need more advice or professional cleaning solutions, visit our tile flooring store in Plano, TX – we’re here to help you make the most of your investment.

Custom Tile Showers

Guide to Custom Tile Showers

Your bathroom is more than just a functional space—it’s a sanctuary where you start and end your day. One of the most transformative upgrades you can make to this essential room is installing a custom tile shower. Let’s dive into why custom tile showers are a fantastic investment and how we can help you create the perfect shower space tailored to your needs and style.

The Allure of Custom Tile Showers

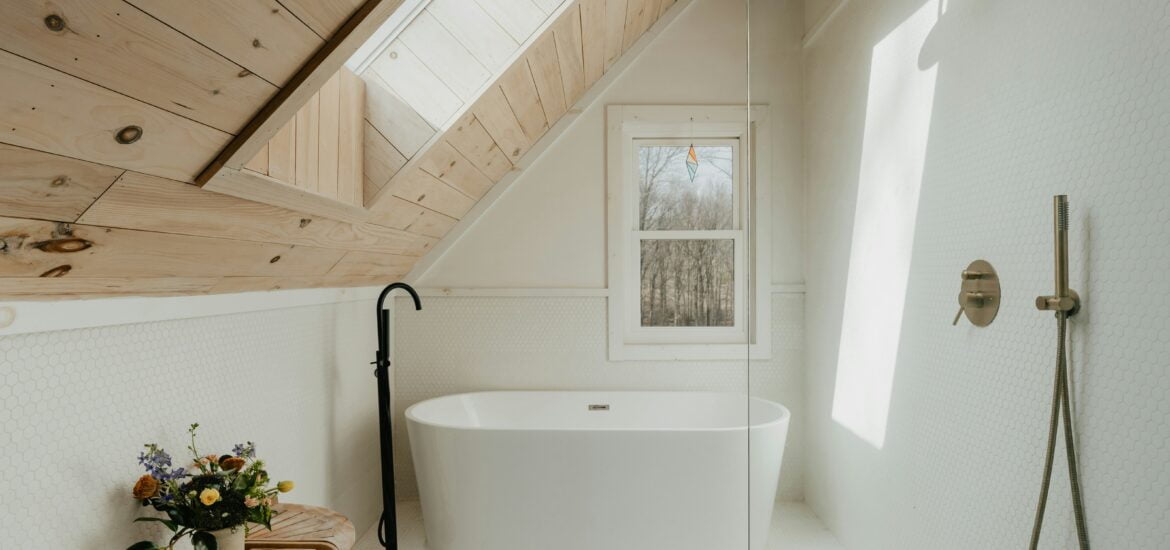
Custom tile showers offer a unique blend of aesthetic appeal and practicality. Unlike pre-fabricated shower units, custom tile showers can be designed to fit any space, large or small, and can be tailored to reflect your personal style. Whether you prefer a minimalist look with sleek, modern tiles or a more traditional design with intricate patterns and textures, the possibilities are endless.

Benefits of Custom Tile Showers

1. Personalization: Custom tile showers allow you to express your individual taste. From selecting the perfect tiles to deciding on the layout and patterns, you have complete control over the design process. This level of customization ensures that your shower is a perfect reflection of your style.

2. Durability and Maintenance: Tiles are known for their durability and ease of maintenance. With proper tile installation, your custom tile shower will withstand the test of time. Tiles are resistant to water, stains, and mold, making them an excellent choice for the moist environment of a shower. Plus, cleaning tiles is a breeze, ensuring your shower always looks pristine.

3. Enhanced Home Value: A beautifully designed custom tile shower can significantly enhance the value of your home. Potential buyers often appreciate the elegance and quality that tile showers bring to a bathroom, making your home more attractive on the market.

The Tile Installation Process

Creating a custom tile shower involves several key steps, and at Nationwide Floor & Window Coverings in Plano, TX, we ensure each step is executed with precision and care.

1. Design Consultation: Our process begins with a thorough consultation to understand your vision. We’ll discuss your preferences for tiles, patterns, colors, and any specific features you want to include, such as built-in niches, benches, or unique layouts.

2. Planning and Measurement: Accurate measurements are crucial for a successful tile installation. We’ll carefully measure your shower space to ensure a perfect fit for your custom tile design. This step also involves planning the placement of the shower pan, which is essential for proper drainage and preventing water damage.

3. Preparation: Before tile installation, we prepare the shower area by ensuring the walls and floors are level and waterproof. This step may involve installing a waterproof membrane or backer board to provide a stable foundation for the tiles.

4. Tile Installation: With the prep work complete, our skilled technicians begin the tile installation process. They meticulously place each tile according to the design plan, ensuring even spacing and alignment. The tiles are then secured with high-quality adhesive and grout, creating a seamless and durable surface.

5. Finishing Touches: The final step involves sealing the grout to protect against moisture and stains. We also ensure that all edges and corners are perfectly finished, giving your custom tile shower a polished and professional look.

Custom Shower Pan Options

A crucial component of any custom tile shower is the shower pan. The shower pan is the floor of your shower, designed to catch and drain water efficiently. When creating a custom shower, you have several options for the shower pan, including:

1. Pre-Formed Pans: These are factory-made and come in various shapes and sizes. They are a quick and cost-effective option, but may not offer the same level of customization as other options.

2. Custom-Built Pans: For a truly bespoke shower, a custom-built shower pan is the way to go. These pans are constructed on-site to perfectly fit your shower space, allowing for unique shapes and sizes that pre-formed pans can’t accommodate.

Creating a Custom Tile Shower with Nationwide

At Nationwide Floor & Window Coverings in Plano, TX, we pride ourselves on delivering exceptional results for our clients. Our team of experienced professionals is dedicated to bringing your vision to life, ensuring your custom tile shower is both beautiful and functional.

1. Expert Advice: We provide expert advice on the best materials and design choices for your custom tile shower. Our team stays up-to-date with the latest trends and technologies in tile installation, ensuring you receive the best possible service.

2. Quality Materials: We use only the highest quality tiles and installation materials, ensuring your custom shower is built to last. Whether you prefer ceramic, porcelain, or natural stone tiles, we have a wide selection to choose from.

3. Attention to Detail: Our attention to detail is unmatched. From the initial design consultation to the final inspection, we ensure every aspect of your custom tile shower is executed with precision and care.

A custom tile shower is an excellent investment in your home, offering a blend of style, durability, and value. At Nationwide Floor & Window Coverings in Plano, TX, we are committed to helping you create the perfect shower space tailored to your needs and preferences. With our expertise in tile installation and dedication to quality, you can trust us to deliver a custom tile shower that exceeds your expectations.

If you’re ready to transform your bathroom with a custom tile shower, contact us today to schedule a consultation. Let’s create a space that you’ll love for years to come.